 White walls, white steps, white roofs, white guttering – and even the white pot from which all that white paint comes – so where’s the photographic interest in that lot? Just all white isn’t it? Well, there’s a lot more to a white surface than you might think at first glance.
I’ve long been fascinated by the extraordinary array of textures, tones and hues to be found in plain old white. Photographing white surfaces and objects presents lots of difficulties, but all can be easily overcome with a little attention to basic technique.
The pictures here are the result of a one hour stroll though the narrow alleys of one small village in Menorca. Almost everything there is painted white.
To keep things simple, I set the White Balance (WB) to Auto White Balance (AWB), and this coped extremely well bearing in mind the tremendous range of colour temperatures between deep shade and bright sun..
The most difficult problem, when photographing white objects is exposure – but it is really a lot easier to solve than you might think. If you point your camera, with its built-in light metering system, at a white object it will register an awful lot of reflected light. In effect, your metering system is looking at all that white, saying ‘Gosh, there’s loads of light here, let’s cut down’. It is being fooled into cutting the exposure down. Unless you are aware of this – and do something about it – your picture will be under-exposed. All you have to do is set your Exposure Compensation function to around +1 – that’s plus one value, or one full ‘f’ stop. Then your camera will ‘over-expose’ by plus one ‘f’ stop to compensate for all that reflected light, and your image will be correctly exposed. Experiment until you get the exposure you want.

Setting the Exposure Compensation value to over-expose by about one full ‘f’ stop is one of the simplest ways of getting the right exposure when photographing white. Don’t be afraid to experiment, you might sometimes need to compensate even more if the white is particularly bright
If you are using the Manual ‘M’ settings as I do all the time, there are another way of getting around this under-exposure difficulty when photographing white areas. I might frame my picture approximately and look at the exposure scale in the viewfinder. I then just set my exposure to over-expose by the appropriate amount – in other words, leave the pointer on the ‘plus’ side of centre. I do this either by setting one full ‘f’ stop over, or doubling the exposure time; for example, I’ll use 125sec instead of 250sec.
Top photograph
Looking out from a shaded alleyway at the brightly lit church tower caused fewer exposure problems than you might think. I just framed the picture and set the exposure using the centre-weighted mode. This has taken the reading from the very bright white tower, but also taken into consideration the large areas of shaded white. Notice how the light is slanting across the right hand surface of the church tower has created texture, while the light hitting the left side is straight on, and this has shown a flat, pure white surface
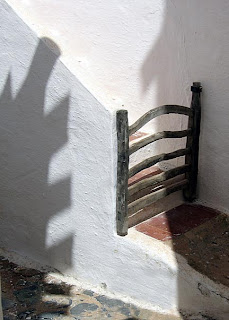
Bottom photograph

Bottom photograph
All the time I am looking for patterns and shapes created by shadows. These can be used as compositional devices in the same way that any other subject can. So place these shadows carefully and move around to adjust the composition. Shadows can create really interesting designs on white
Next, in part 2 – more exposure options
Next, in part 2 – more exposure options


No comments:
Post a Comment