 Let’s go though just a few of the techniques you can use to capture simple indoor flash portraits when your flash unit is attached to your camera’s hot shoe.
The essential thing to remember is that a portable flash is a very small-sized light source and when pointed directly at your subject will cause hard-edged, dark shadows.
Flash is an instant burst of light lasting sometimes as little as 1/20,000sec, so its effects are difficult to predict. Lots of practice helps, but remember, you have the luxury of instant digital playback – so use it; and don’t be afraid to experiment if you don’t get it right first time.
What about ‘bounced’ flash? Bouncing (reflecting) light off a white wall or reflector is a bit like playing snooker – its all about judging angles and distances. It really does need practice. Do not get fixated by bouncing (reflecting) the flash off the ceiling. That will give you toplight. Ugh! We spend a lot of time avoiding top light when we are shooting outside by trying to time our photography for early morning and late afternoon when the sun is low in the sky. So why do we want to use top light indoors? It’s horrible. Just take a look at the set-up in picture 1. The flash has been directed up at a white ceiling. Its effect is seen in picture 2 – eyes light black holes in the snow, deep shadow under the chin. Don’t do it. You can improve things by placing a reflector under the model’s face (picture 4) so that some of the light coming down from the ceiling is reflected back up again under the eyes and chin. This has produced picture 3 – much improved.
Another possibility is to direct the flash back over your head to a large reflector positioned behind you. See picture 5. A wall, white door, or large white card will do. This should produce an effect similar to picture 6. Now,  in effect, you are using frontlight from a large light source (that big reflector behind you). It will have the effect of flattening the image by taking away the shadows. This can be very flattering for an attractive young model, but a bit boring when you are wanting to convey the character of an older or male subject. For that you need the ‘star of the show’ -sidelight - and I’ll show you more about that in the next post, but first, read about that picture I showed you yesterday...
So what was the set-up for the picture of the man with the mask?
A sheet of newspaper has been taped to the wall off the picture to the right and the flash head has been pointed at it so that the flash light bounces back to the  model’s face. The wall was about 5 feet away from us. The fastest shutter speed compatible with the camera’s flash synchronisation (1/160sec) has been used to eliminate any other light in the room and the model has been positioned as far as possible from the wall behind him. The light of the flash has not carried as far as this background so it has not been lit – it appears as a black. I wanted the deep shadows to add drama, so no reflector was used on the left hand side of the picture
 NEXT - in part 3
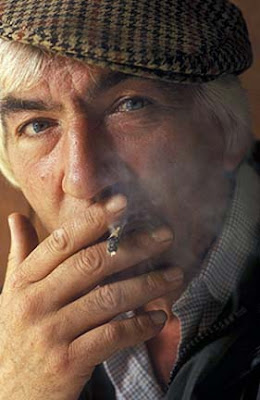
What was the set-up for the picture of the chap kippering his lungs with the roll-up fag, above?
And more on sidelight

9 Jan 2008
How to take flash photographs - part 2
Labels:
flash,
flash photography,
frontlight,
photography,
photography course,
sidelight,
toplight
Subscribe to:
Post Comments (Atom)


No comments:
Post a Comment